
Those black streaks on your roof are not dirt, pollution or water staining. They are living colonies of a cyanobacterium called Gloeocapsa magma — and they are actively eating your shingles. Cleaning algae from your roof before it establishes as a full colony is one of the highest-return maintenance tasks a homeowner can do. Left untreated, roof algae shortens shingle lifespan by 5–10 years and can accelerate a roof replacement that costs $8,000–$25,000.
This guide covers what roof algae actually is, how to remove it from every roof type, the best roof algae remover options, including DIY and professional products, how to treat roof tiles differently from shingles, and how to prevent regrowth after cleaning.
What causes algae on roofs?
The organism behind the black streaks
<em>Gloeocapsa magma</em> is a cyanobacterium — technically a photosynthesising bacteria rather than a true algae, though “roof algae” is the term the roofing industry and most homeowners use. Gloeocapsa magma gained notoriety in the Southeastern United States in the 1990s but has since spread throughout most of the rest of the United States and Canada. It is now effectively a nationwide issue.
The organism is airborne. Algae can spread from one infected roof to another via the release of airborne spores. As more homes are built closer together, this hardy algae has been able to spread rapidly. If one house on your street has visible black streaks, spores are already on every surrounding roof.
Why your shingles are the food source
The mechanism of damage is specific to modern fiberglass asphalt shingles. Gloeocapsa magma feeds on the limestone filler that gives an asphalt shingle its weight. Unprotected surface granules that cover shingles begin to loosen and wash off with rainfall. This condition then reduces a roof’s ability to reflect sunlight, which results in overheating of the roof.
Older asphalt shingles used organic paper felt rather than fiberglass mat and limestone filler — this is why the algae problem has worsened since the 1980s as fiberglass shingles became the dominant product. The material that makes modern shingles affordable and durable is also the primary food source for <em>Gloeocapsa magma</em>.
Why it starts on the north side
Algae and other types of build-up often form on the north and west parts of roofs that are shaded or receive less sun. The bacteria accumulate over time as they feed on moisture and calcium carbonate. This accumulation begins to show as black stains as the cyanobacteria develop their dark and hard UV-protective outer coating.
The dark colouration is a survival mechanism — the black pigment protects the colony from UV radiation, which is why the streaks are dark brown-black rather than green or blue. Clean areas around metal flashings, vents and chimney stacks that you may have noticed are clean because galvanised sheet metal’s copper and zinc coating is toxic to algae. When it rains, the water washes trace amounts of the metal down the roof and inhibits algae growth in those areas.
What happens if algae on roof shingles is left untreated
The visual streaking is the least of the problems. Algae (specifically Gloeocapsa magma) provides the chemical warfare. These microscopic organisms are airborne and spread from rooftop to rooftop. The physical damage progresses in stages:
Stage 1 (Years 1–3): Visible black streaking. Primarily cosmetic but granule loss is beginning.
Stage 2 (Years 3–7): Established colony holding moisture against shingle surfaces. Accelerated granule loss. UV reflectivity reduces — the roof runs hotter, increasing energy costs and accelerating asphalt aging.
Stage 3 (Years 7+): Full colony coverage enabling moss and lichen establishment. The presence of this form of algae on roof shingles enables the biological growth of other damaging organisms, such as mold, moss, and lichens, the fungal portion of an algae colony. These organisms anchor into the top layer of shingles and contribute to a further loss of granules. They grow into the slots of the shingles and along the edge, causing them to lift, making a roof deck more susceptible to wind damage and leaks.
The cost of waiting: Gloeocapsa magma feeds on the limestone in shingles, strips away protective granules, and shortens roof life by 5 to 10 years. A professional soft wash costs $300 to $600 and can be repeated every 2 to 3 years to prevent damage. Set against a $10,000–$25,000 roof replacement, regular algae removal is one of the most financially clear-cut maintenance investments available.
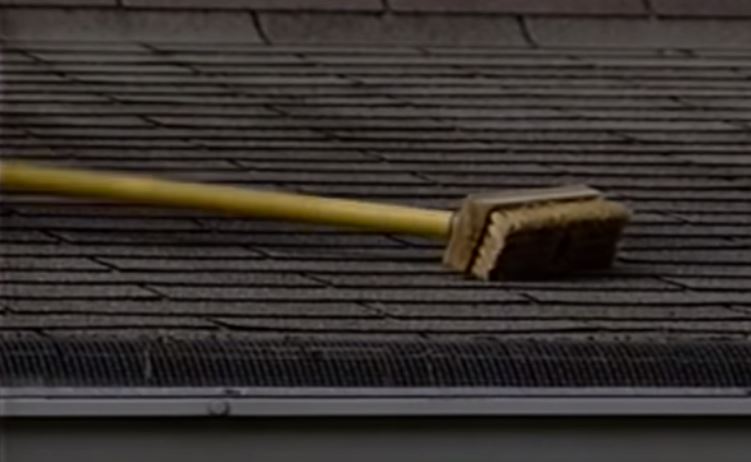
How to remove algae from roof shingles — step by step
The method that works: soft washing
The correct method for cleaning algae from roof shingles is soft washing — a low-pressure application of sodium hypochlorite solution that kills the organism at cellular level. The Asphalt Roofing Manufacturers Association (ARMA) recommends using a 50/50 solution of household strength sodium hypochlorite (pool chlorine) and water to remove moss and algae.
Do not pressure wash asphalt shingles to remove algae. Roofing contractors advise homeowners not to attempt cleaning algae from a roof with a pressure washer. Under no condition should any pressure greater than that from a standard garden hose be used on a roof. Pressure washing would be an exercise in futility because high pressure cleaning will not kill Gloeocapsa magma. However its force will dislodge granules, further weakening and scarring the shingles, reducing the life expectancy of a roof and possibly even voiding its warranty.
What you need
- Pump garden sprayer or soft wash system (50–150 PSI maximum)
- Sodium hypochlorite — pool-grade bleach (10–12% concentration) or household bleach (5.25–6%)
- Surfactant / dish soap — a small amount helps the solution cling to the roof surface and extend dwell time
- Garden hose for pre-wetting and rinsing
- Non-slip rubber-soled shoes
- Safety harness if working on a roof above single storey height
- Chemical-resistant gloves and eye protection
- Plastic sheeting or heavy watering for plants below the roofline
The cleaning solution
ARMA-approved mix: 1 part household bleach to 1 part water (50/50). For pool-grade 10–12% sodium hypochlorite, dilute 1 part concentrate to 3–4 parts water to achieve a similar active chlorine level. Add a small squirt of dish soap or purpose-made surfactant to improve adhesion.
Oxygen bleach (sodium percarbonate) alternative: A gentler option that releases oxygen to lift stains rather than using chlorine chemistry. Takes longer to work — allow 30–45 minutes dwell time rather than 15–20 — but is less corrosive to metal flashings and safer for nearby plants. Less effective on heavy established algae colonies.
Never mix sodium hypochlorite with ammonia, vinegar or any acid-based cleaner. The reaction produces toxic chloramine gas.
Step 1 — Protect landscaping
The sodium hypochlorite solution that kills algae on your roof will also damage or kill plants if it reaches them in concentration. Before applying any cleaning solution, thoroughly wet all plants, shrubs and garden beds directly below the roofline. Saturate the soil so it cannot absorb concentrated runoff. For anything particularly valuable, cover with plastic sheeting during the application. Immediately after rinsing the roof, re-wet all plant areas with fresh water.
Step 2 — Pre-wet the roof surface
Spray the roof surface with plain water before applying the cleaning solution. A pre-wet prevents the solution from being absorbed too rapidly into dry shingle surfaces and ensures more even dwell time distribution across the entire area.
Step 3 — Apply the cleaning solution
Working from a ladder or from the roof surface using your pump sprayer, apply the solution from the bottom of the roof upward — counterintuitive but correct, so that runoff flows over already-treated sections rather than untreated sections below. Work in sections, ensuring complete coverage of all streaked and discoloured areas. Pay particular attention to north-facing sections and shaded areas where growth concentrates.
Apply generously enough that the solution remains visibly wet on the surface.
Step 4 — Allow 15–20 minutes dwell time
Allow 10–20 minutes for the solution to work without letting it dry completely. During this time you will see the biological growth begin to change colour — algae colonies shift from dark brown-black toward grey or pale as the chemistry kills the organisms. Do not allow the solution to dry on the surface before rinsing; dried bleach residue can leave white staining and is harder to rinse clear.
On heavily established colonies, a longer dwell of 20–30 minutes produces better results than reducing dwell time and compensating with more aggressive rinsing.
Step 5 — Rinse from ridge to eave
Rinse the roof from the ridge downward toward the eaves with a garden hose or soft wash system at under 150 PSI. A standard garden hose without a pressurising nozzle is sufficient — the rinsing step does not need pressure beyond what gravity provides. The low-pressure water dislodges dead algae matter without stripping granules.
For stubborn staining that has not fully cleared with one treatment, a second application is safer than increasing rinse pressure. Allow the roof to dry between applications.
Step 6 — Post-treatment expectations
The roof will not look completely clean immediately after treatment. Dead algae matter washes off gradually over several rainfalls in the weeks following treatment. This is normal. The treatment has killed the organisms — the visual evidence clears with time and weather exposure rather than requiring a second mechanical cleaning.
Best roof algae remover options
Professional cleaning products
Purpose-formulated roof algae removers are available at hardware stores and online and offer several advantages over straight household bleach: pre-mixed concentrations reduce the risk of solution errors, many contain proprietary surfactants for better adhesion, and some include built-in biocide treatments that extend the time before regrowth.
What to look for in a commercial roof algae remover: The active ingredient should be sodium hypochlorite, sodium percarbonate, or a quaternary ammonium compound. Products labelled for roof cleaning and listing ARMA-compliant application methods are the benchmark. Avoid any product that recommends pressure washing for asphalt shingles as part of its application instructions.
Widely available products include Wet & Forget (no-rinse formulation, slower acting), Spray & Forget, and various contractor-grade sodium hypochlorite concentrate products. These vary in application method — some are apply-and-leave products that rely on rainfall for rinsing, others require a manual rinse after dwell time.
Apply-and-leave products are safer for homeowners less comfortable working on roofs, as they eliminate the rinsing step and can be applied from a ladder or even a ground-level telescoping sprayer. The trade-off is slower results — visible improvement typically takes 3–6 months as rainfall gradually washes the dead growth away.
Rinse-required products produce faster visible results — typically full cleaning effect within 24–48 hours — but require the pre-wetting, application and rinsing sequence described above.
DIY vs professional cleaning costs
DIY cost: Household bleach solution — under $20 in materials for an average-sized home. Purpose-made commercial products — $20–$80. If you already own a pump garden sprayer and appropriate safety equipment, total DIY cost is low.
Professional cleaning cost: A professional soft wash typically costs $300–$600 for a standard single-storey home and $450–$750 for two-storey properties. The premium pays for proper equipment, correct chemical concentrations, appropriate plant protection, and the safety of working at height. See our roof cleaning cost guide for market-specific pricing.
When professional is the right choice: Two-storey or steeper roofs, any roof with significant moss or lichen alongside the algae (lichen requires specialist treatment beyond algae removal), roofs over 15 years old where shingle condition makes technique precision important, and any homeowner not comfortable working at height.
Algae on roof tiles — does the method differ?
Concrete and clay tiles
Algae on roof tiles — both concrete and clay — presents differently than on asphalt shingles. Tile roofs do not have the granule-loss vulnerability of asphalt, so the primary concern is cosmetic staining and the moisture retention that algae colonies create between tile surfaces and battens.
The soft wash method works on tile with one difference: moderate pressure washing (1,200–1,500 PSI) is also an acceptable approach for concrete tile, unlike asphalt shingles. However, soft washing remains the recommended first approach because it kills the biology rather than mechanically removing it, producing longer-lasting results.
For algae on roof tiles specifically:
- Apply the sodium hypochlorite solution in the same way as for shingles
- Dwell time can be extended to 20–30 minutes on tile without the granule-loss risk that limits dwell time on asphalt
- Rinse from ridge to eave — never angle the nozzle upward under tile edges, which forces water beneath the tile surface
- For concrete tile that has significant biological staining, a soft wash followed by a gentle 1,200 PSI pressure rinse produces the best result
- Clay tile: stick to soft wash only — clay is more brittle than concrete and the porosity difference means chemical treatment works effectively without mechanical pressure
Cedar shake roofs
Cedar is susceptible to algae in the same way as asphalt — the organic surface and moisture retention create good growth conditions. Use sodium percarbonate (oxygen bleach) rather than sodium hypochlorite on cedar — chlorine bleach at standard asphalt concentrations can bleach and dry cedar prematurely. A 3–4% oxygen bleach solution applied and left to dwell for 30–45 minutes, then rinsed gently, is the correct approach.
Never pressure wash cedar shake for algae removal. The fibres split and splinter under mechanical pressure above 500 PSI.
How to remove algae from roof shingles — DIY safety
Working on any roof carries significant fall risk. Before attempting DIY algae removal from roof shingles, assess honestly:
Single storey, gentle pitch, comfortable with ladders: DIY is reasonable. Use a pump sprayer, work from a ladder where possible rather than climbing onto the roof surface, and have someone at the base of the ladder throughout.
Two storeys or any steep pitch: Hire a professional. The fall risk increases non-linearly with height and pitch. A professional clean costs $400–$600. An emergency room visit following a fall from two storeys typically costs many multiples of that, and the potential for serious injury is real.
Safety equipment for any DIY roof work:
- Non-slip rubber-soled shoes — smooth soles are a fall risk on any roof surface
- Safety harness anchored to a ridge strap for any work on the roof surface itself
- Eye protection — sodium hypochlorite splashing into unprotected eyes causes immediate chemical burns
- Chemical-resistant gloves throughout
- Never work alone
Preventing algae regrowth after cleaning
Cleaning removes the existing colony. Prevention determines how long before the next colony establishes. There are three proven approaches — used together, they can extend the clean-to-clean interval from 12–18 months to 3–5 years.
Zinc or copper ridge strips
Consider installing a strip of copper or zinc-coated sheet metal along each side of the roof, just below the ridge. To be effective, two to four inches of metal should be visible on the roof.
The mechanism is simple: rainfall hits the metal strip, picks up metal ions, and carries them down the roof slope. Those ions create an environment where algae cannot establish. This is the same reason clean areas appear below metal flashings, vents and chimney stacks — the metal runoff inhibits biological growth in its path.
Zinc kills the algae. Copper also works and some of the algae resistant shingles have some copper-coated granules. Zinc strips are the more common choice due to lower cost and easier installation. Copper strips are more effective and more durable but cost more.
Installation: Zinc or copper strips are available from roofing suppliers in rolls of various widths. The strip is secured along the ridge using roofing nails or screws with rubber washers. For homes with long roof runs, additional strips installed every 10–12 feet of vertical drop provide better coverage than a ridge-only installation.
Effectiveness: Works best in climates with regular rainfall that consistently carries metal ions down the roof surface. In dry climates where rainfall is infrequent, the mechanism is less consistent. The strips are particularly effective in the Pacific Northwest, Southeast, and Midwest where regular rainfall is the norm.
Post-clean biocide treatment
After the cleaning rinse, apply a dedicated post-clean biocide treatment while the roof surface is still damp. Commercial products in this category — sometimes labelled as moss and algae preventers — leave a residual antimicrobial film on the shingle surface that inhibits regrowth. A single application extends the clean-to-clean interval from approximately 12–18 months to 2–3 years in most climates.
Algae-resistant shingles at replacement time
Roofing manufacturers have begun incorporating copper granules into roofing products to create algae-resistant shingles. GAF StainGuard, CertainTeed with StreakFighter, and Owens Corning TruDefinition all include copper-containing granules in their shingle surface layer. These provide meaningful protection — Owens Corning and CertainTeed both offer warranty coverage specifically for Gloeocapsa magma staining.
The honest caveat: Algae-resistant shingle protection lasts approximately two years before the resistance gets prorated out, leaving zero warranty coverage by year two. The copper granule concentration in the surface layer dilutes over time as granules wash away. Algae-resistant shingles are meaningfully better than standard shingles for the first 5–7 years, but they are not a permanent solution — they reduce the frequency of algae treatment rather than eliminating the need.
Reduce shade and moisture conditions
Additional maintenance tips: keep gutters clean, trim overhanging tree branches to increase sun exposure, and perform annual roof inspections.
Algae establishes first in shaded, moisture-retaining areas. Tree branches that overhang the roof serve two functions for algae: they reduce sunlight that would otherwise inhibit growth, and they deposit organic debris that retains moisture on the shingle surface. Trimming branches to create at least a 3-foot clearance above the roofline reduces both shade and debris load, and meaningfully slows algae re-establishment after cleaning.
Blocked gutters that cause water to back up at the eaves create the sustained moisture conditions algae requires. Regular gutter cleaning — see our gutter cleaning frequency guide — prevents moisture build-up at roof edges that supports algae growth in the very sections of the roof most visible from the street.
Algae vs moss vs lichen — knowing which you have
These three organisms often appear together but require different treatment approaches, so identifying which you are dealing with affects your cleaning method.
| Growth type | Appearance | Location | Damage | Treatment |
|---|---|---|---|---|
| Algae (Gloeocapsa magma) | Dark brown-black streaks, vertical smears | Whole roof, worst on north-facing and shaded sections | Granule loss, reduced UV reflectivity | Soft wash sodium hypochlorite solution |
| Moss | Green, spongy clumps, 1–3 cm thick | Shaded sections, roof valleys, ridge lines | Root systems lift shingles, break tar seals | Soft wash + biocide; manual removal for thick growth before treatment |
| Lichen | Grey-green crusty patches, irregular shapes | Any exposure but worst in cool humid climates | Bonds to shingle surface, very difficult to remove | Specialist chemical treatment; multiple applications; professional recommended |
If lichen is present alongside algae, the cleaning process is more complex and a single soft wash treatment will not fully resolve it. Lichen removal requires a specialist biocide applied in multiple treatments several weeks apart to allow the organism to fully die before rinsing. Attempting to mechanically remove lichen before it has died chemically will strip shingle granules.
Frequently asked questions
Algae on roofs is caused by airborne spores of Gloeocapsa magma — a cyanobacterium that feeds on the limestone filler in asphalt shingles. The spores are carried by wind and wildlife between roofs. Once established, the colony grows year over year, producing the characteristic dark brown-black vertical streaking. Humid climates and shaded roofs create the moisture conditions where growth accelerates fastest.
The correct method is soft washing — applying a diluted sodium hypochlorite solution (1 part household bleach to 1 part water, or equivalent) at low pressure (50–150 PSI maximum) using a pump sprayer. Allow 15–20 minutes dwell time, then rinse from ridge to eave with a garden hose. ARMA endorses this as the approved method for asphalt shingles. Do not use pressure washing — it does not kill the organisms and strips protective granules.
For DIY use, the ARMA-recommended 50/50 household bleach and water solution is the most effective and lowest-cost option. For a no-rinse approach, Wet & Forget and similar apply-and-leave products work well for homeowners less comfortable working on roofs — results take longer (3–6 months of rainfall) but require less active work on the roof surface. For professional use, pool-grade sodium hypochlorite at 10–12% diluted to 3–5% at application is the contractor standard.
Use soft washing at under 150 PSI — never pressure washing. Mix a 50/50 solution of household bleach and water with a small amount of surfactant. Apply with a pump garden sprayer, allow 15–20 minutes dwell, rinse gently with a garden hose from ridge to eave. The soft wash approach kills the algae at cellular level without the mechanical force that strips granules. For shingles older than 15 years, use a more diluted solution (1 part bleach to 3 parts water) and reduce dwell time slightly to minimise chemical contact with already-compromised granule adhesion.
After a soft wash clean, algae typically takes 2–4 years to re-establish visibly in humid climates and 3–5 years in drier climates. Applying a post-clean biocide treatment extends the interval to the upper end of this range. Zinc or copper ridge strips further extend the interval by inhibiting spore establishment between treatments. In the Pacific Northwest and Southeast US, annual inspection with cleaning every 2 years is a reasonable baseline. In drier Midwest and Southwest climates, every 3 years is typically sufficient.
It causes genuine structural damage over time. The organism feeds on the limestone in shingle surfaces, loosening and accelerating the loss of the protective granule coating. Without its granules, the asphalt layer below is exposed to UV radiation and accelerated weathering. Left untreated, Gloeocapsa magma shortens shingle lifespan by 5–10 years — turning a 25-year roof into a 15–20 year roof. The staining also enables moss establishment, which causes additional physical damage by lifting shingle edges with its root system.
Algae grows on all roof types but the mechanism differs. On concrete and clay tiles, algae creates cosmetic staining and holds moisture against tile surfaces and battens, but does not feed on the tile material itself the way it feeds on limestone-filled asphalt shingles. Algae on roof tiles is therefore more of a moisture management and appearance issue than the structural concern it represents on asphalt. The removal method is the same — soft wash sodium hypochlorite solution — but concrete tile can additionally tolerate a moderate-pressure rinse (1,200–1,500 PSI) that asphalt shingles cannot.
Related guides
- How to pressure clean a roof — full method guide for tile and metal roofs
- How often to clean your roof — frequency recommendations by roof type and climate
- Roof cleaning cost guide — what professional algae removal costs in your area
- Roof inspection checklist — 27-point inspection before any treatment
- Cleaning schedule generator — personalised maintenance calendar based on your roof and location
- DIY vs Pro quiz — should you clean your own roof or hire a professional?
Updated April 2026. ARMA cleaning recommendations and product guidance current as of 2026.