
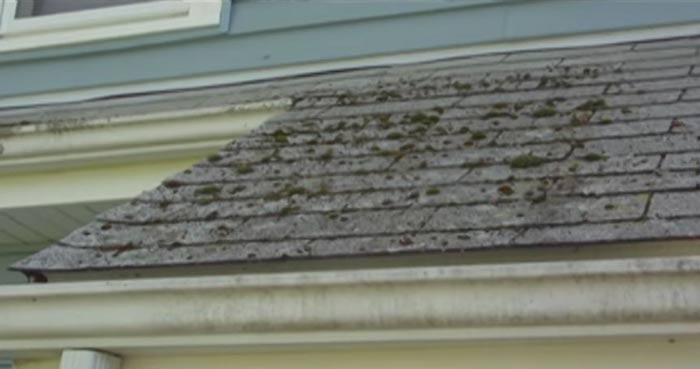
Appearance of mold on your roof shingles brings about big reasons for concern. Not only does mold deteriorate the beauty of the house, but it also greatly reduces the lifespan of the roof shingles. This makes the roof vulnerable to wear and tear, not even to mention the effect on the resale value of the house, should you consider to sell it sometime later.
This makes roof cleaning an important exercise. Once you discover the mold on your roof shingles, you need to consider some of the available methods of removing the mold. There are three available methods used to clean mold from roof shingles. The most common and easily available method is using the chemical bleach.
What to know before cleaning mold from the roof shingles
The first thing to consider before taking on the cleaning task is safety. The work involves working at height and a mold-infested roof could be very slippery. This makes roof cleaning risky for those working on the roof. The fact that chemicals are involved in the process also presents another risk that requires a safety precaution. The following are some safety precautions to take before taking on this task.
- Wear anti-skid shoes. This help to avoid slipping from the roof.
- Wear rubber gloves, eye protection, and a gas mask to protect your body from the bleaching chemicals.
- Wear long-sleeved shirts and pants that cover the whole body while working. Use an apron if possible.
After considering all the safety precautions, one can now embark on the leaning exercise. The first method to consider is using the bleaching chemical.
Step by step Guide for Cleaning molds from roof shingles
- Spray the vegetation around the house with clean water to protect them from the chemical run over. You can cover some plants with plastic bags to be more careful.
- Use a hard brush to scrub areas with the thickest layers of mold and the hard to reach places with your gas mask on to protect yourself from the mold dust. Care must be taken during climbing to avoid accidents. Ensure to use a ladder.
- Mix the chlorine bleach with water in a ratio of one to four. One measure of chlorine goes with four measures of water.
- Add a small measure of Trisodium phosphate(TSP) in the mixture to remove the mold stains on the roof shingles. 50ml of TSP could go with 20 liters of the mixture.
- Using a hand spray, start spraying the molded shingles until they soak the solution in. Start spraying from the bottom line of shingles as you climb to the top row. This is to avoid the mold from running down to the unsprayed shingles. Ensure all parts of the roof are sprayed.
- After spraying, wait for 15-20 minutes for the solution to soak into the shingles. Good weather conditions are important to let the bleach work on the mold and stains. Too much rain could wash away the chemicals and also too much sunshine could make the bleach evaporate before killing the mold.
- After the bleach has diluted the mold, the next thing is to rinse the shingles. U can use the hand spray or a garden hose with clean water. Ensure to rinse the roof thoroughly to ensure all bleach has been cleaned off.
- After rinsing, inspect the shingles for any remaining mold. Should you find any remaining mold, apply the bleach, wait for 10 minutes and rinse again.
- After cleaning, you need to water the plants around the house again to clean off any bleach on the plants.
This cleaning method works for many people. Still, other options are available in case you are not keen on using bleach. These are:
- Use of a pressure washer
- Use of non-bleach cleaning agents
Pressurized Cleaning
A pressure washer is used in this case to clean metallic roofs. This method is fit only for metallic roofs as the high pressure of the water could damage the shingles made from other materials. Some pressure washers are gas-powered while others are electric. The most common type used for cleaning are gas-powered.
A step by step guide for using the pressure washer is as shown below:
- First, confirm that the pressure washer is in good condition and there are no obvious risks for using it.
- Attach the proper type of nozzle to the washer. The 25-degree flushing nozzle is recommended for this task. In case the washer comes with one nozzle, adjust it until u get the right kind of flushing water jet from the nozzle.
- Clean the dust and any type of dirt from the inlet filter and connect any other accessories you might require on the washer. Ensure that you have proper support for the machine or a long enough cord to cover the roof.
- Run some water through the machine for at least a minute to remove air and optimize the machine.
- Start the engine of the washer by pulling the starter cord. Test the water jet by pulling the washer handle to release the high-pressure water. Ensure the nozzle is facing away from people or property at this time.
- Climb to the roof with the nozzle using a ladder and aim the high-pressure water to the mold until it clears off. Start from the high rooftop coming down to avoid runoff of the mold to already cleaned areas.
- Stop once the roof is clean and turn off the machine.
Using non-bleach cleaning Shampoo
This is an eco-friendly method that is used to clean molds with minimal effects on the environment. However, the products used are more expensive compared to bleach. Steps are as listed below
- First, scrub the areas on the roof with thick layers of mold.
- Sprinkle water on the vegetation around the house to protect them from the cleaning agent effects.
- Spray the roof using the hand spray until all parts of the roof are properly soaked. Some cleaning agents would come as already diluted but others would require to be mixed with water. This direction is given by the manufacturer.
- Wait for 10-15 minutes for the mold to be completely dissolved by the solution.
- Rinse the roof shingles using clean water and inspect for any leftover molds.