Fascia boards are what holds gutters on most roofs. This is because they provide a solid and an easily-accessible surface to attach the gutters. They’re also easy to reach and repair when you need to make changes to the gutters. However, some houses don’t have fascia boards yet still need to have gutters installed.
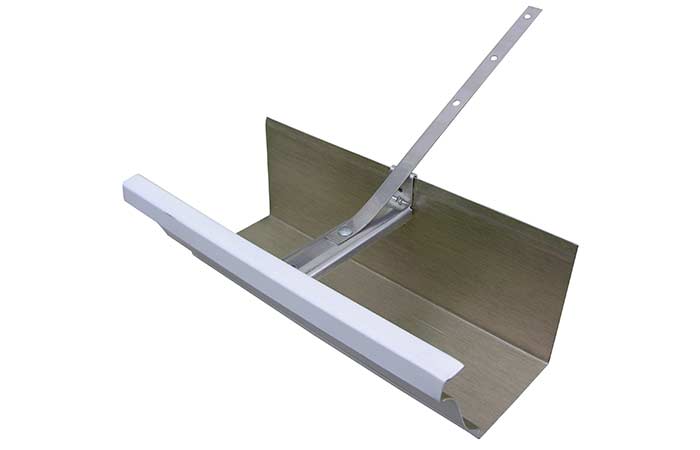
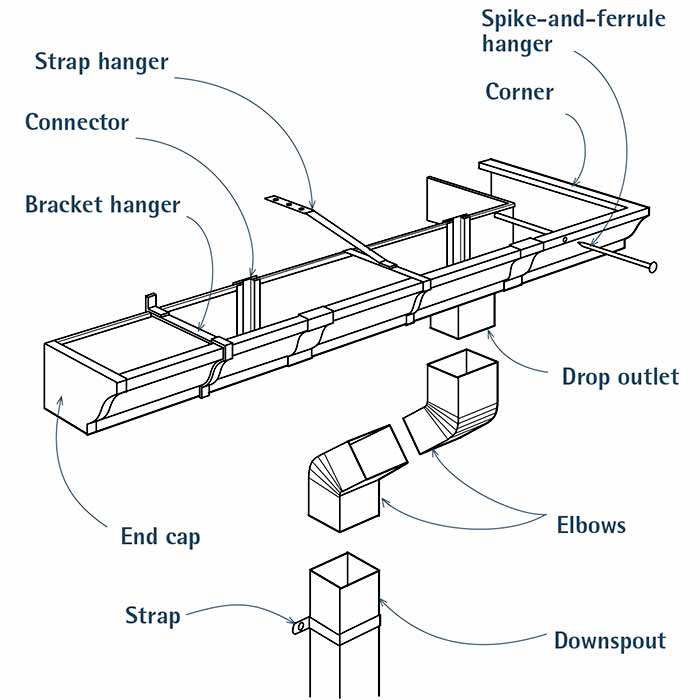
Thankfully, you can install gutters on your roof even when it doesn’t have a fascia board by simply using roof straps. These are pieces of metal or other suitable material that are attached to the gutter on one end and to the roof on the other. This way, the weight of the gutters is supported directly by the roof.
The installation of roof hangers isn’t as easy as it might sound but, still, you can safely install the hangers on your roof and have them support gutters all around the house. While we detail the steps below, always seek the services of an expert to prevent causing more damage to the roof than you need to.
What you will need
For this procedure, you need the following items:
- Pop rivet gun
- Ladder
- Cordless drill
- Offset tin snips
- Gutter
- Gutter sealant
- Elbows
- 1/8-inch medium length rivets
- 1¼ inch self-tapping head screws
- Duckbill tin snips
- Measuring tape
- Hex head driver
- Crimper
- Gutter flashing
- Gutter hanging strap
- Downspouts
- ¼ inch hex head screws
- Roof straps


Method
Not having a fascia board shouldn’t dissuade you from installing a gutter system on your roof. You can use roof hangers or roof straps to install them as detailed in the steps below.
- Start by measuring the size of the house while noting the areas that will have downspouts and other features important to the gutter system. This is determined by how large of a gutter system you desire and the actual size of the house in floor square feet.
- Using the measurements you would have obtained in the step above, cut the gutters to the desired lengths with the help of the tin snips. Be careful with cutting to avoid allowing too little between joints which can lead to leaks.
- For ease of joining the sections of the gutters, notch the sections to join each other using the tin snips.
- Join the sections together by the help of gutter sealing placed at least ½ of an inch from the edges. You can easily snap them into place using the notches you created in the steps above. This provides a solid joint while the sealant provides the needed waterproof seal to prevent leaks.
- You then rivet the joined sections by drilling holes at least 1/8 of an inch at the front of the gutter then install the rivets using rivet guns. Rivet all the joined sections to provide a sturdy joint.
- Over each rivet and in the joints created, add caulking using gutter a sealant for a waterproof seal.
- Assemble the gutters while still on the ground before going up the ladder with it.
- Mark the sections with the downspout outlet then cut the outlet hole using the offset tin snips. This should be about 1/16th of an inch from the outside line.
- You then rivet the outlet in the hole using the pre-drilled holes at 1/8th of an inch.
- Measure the slope to ensure water flows towards (not away from) the downspouts. Mark this slope on the area under the roofing materials to avoid losing it.
- Attach the roof straps on the roof at designated sections to support the gutters. You need to be very careful in this stage as it involves disturbing the shingles. If not done right, you can make extensive damage to the roof.
- Attach the gutters on the roof straps. Given that you will be moving up the ladder with the preassembled gutters in hand, you will need at least two ladders apart to help two people carry the gutters to the roof.
- To keep the water from going behind the gutters, you should add gutter flashing. The flushing should be installed under the shingles with the focus of keeping the water and ice away from the roof.
- Finish off by attaching the elbows to the downspouts for water collection. You can then direct the downspouts to your desired locations.
Always focus on directing the water away from the house. Installing gutters without a fascia board isn’t easy particularly given that you will need to tamper with the roofing materials such as shingles.
Safety precautions
Gutter installation entails lots of movements up and down the ladder and should thus be treated with lots of care. Some of the precautions to keep in mind include the following:
- Only climb a ladder when the locks on an extension ladder are properly engaged.
- When climbing or working on a ladder, maintain three points of contact with the ladder at all times. The first two points are usually your legs with the third being one of your hands. If the other hand is also needed during work, use a harness around your waist to maintain contact with the ladder and the roof.
- Always have someone on the ground to watch over you. This spotter can also support the ladder when it’s not on stable ground.
- Make sure the ladder can support your weight and that of the materials and tools that will be carried up. In this case, ensure the ladder has been rated to carry your weight and that of the gutters and tools.
- Also, check to ensure that the roof has the sturdiness to carry your weight if at all you will need to work from the roof. This is needed when installing the roof straps for example. Inspect the sections under the roof to ensure its structure is strong enough.
- Avoid using the topmost rung of the ladder. If the ladder isn’t tall enough to work on your roof without using the topmost rung, you’re better off getting another ladder.
- Without added safety features, you should not place a ladder on a side slope with more than 6 degrees or the slope on the side slope is more than 16 degrees. This is because there’s a high chance of falling from the ladder.
- Tie the stiles of the ladder to a stable point on the roof to steady it further. In the case that the legs of the ladder slide away, these will keep you from falling.
- Avoid going on a roof with dirt or one that’s wet. Dirt and wetness increase your chances of slipping and falling off the roof. If you must work on such a roof, use a harness.
- If you have to install the gutters on a story building and have to put the ladder on the ground floor’s roof, always make sure the rungs of the ladder are horizontal. That’s why you may need ladder leveling tools.
- Avoid using a ladder if you have a fear of heights. This is especially important when you need to work on the upper floors of the house.
- Keep away from power lines. If they are close to the roof, call a professional to do the work for you.
- Place the ladder on stable ground. If you have to work on slippery ground, secure the ladder either at the base or the top before climbing it.
- If you have to put the ladder on the roof, avoid asphalt roofs as they’re easily damaged. Ladder pads will come in handy in such as case.
- Before using any ladder whether it’s old or new, always inspect it for any loose or broken parts. Fix them if you find any.
- To stay safe with ladders, use the 4:1 rule which states that the ladder needs to be 1 meter from the wall for every 4 meters ascended. You can either divide the height of the ladder by 4 then position it this far from the wall, or just maintain a 75-degree angle between the ladder and the ground.
- Don’t lean backwards or sideways as you use the ladder since you might fall off.
With these aspects in mind, you can be sure that the one using the ladder will always be safe. Avoid working on the roof if you can work from the ladder since it’s safer there.
More on Gutters
- Why are Gutters Important & When are Gutters not Necessary?
- How Long do Gutters Last?
- Do Gutters Cause Ice Dams?
- How to Fix a Sagging Gutter
- Vinyl vs Aluminum vs Steel Gutters: Differences, Pros & Cons
- Rain Gutter Alternatives, Low Maintenance, Cheap & DIY Options
- Rain Diverter vs Gutter-Differences & Similarities
As an Amazon Associate, we earn from qualifying purchases. Details here
