
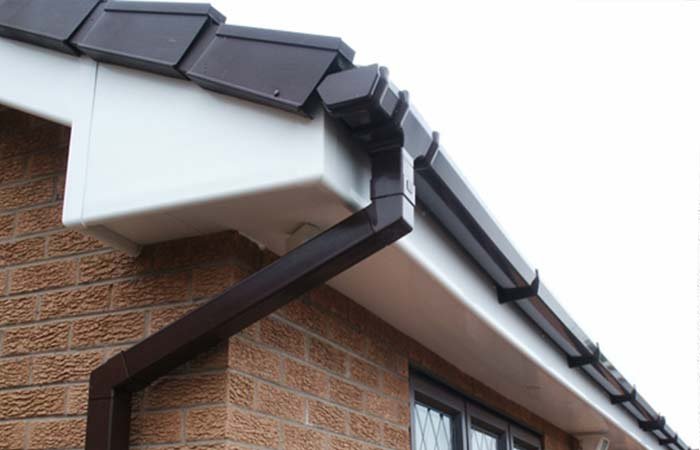
With time, your roof gutters can get loose and pull away from the fascia board. This can be due to various reasons such as the weight of the rain, snow and dirt. Pure old age can also be the reason behind your gutters sagging. Without fixing them on time, you can easily lose them as they tend to sag more and may end up breaking due to their own weight and that of the winds.
You can fix this issue in one of several methods which include replacing the gutter bracket, changing the gutter spikes and reinstalling the hidden gutter hangers. All of these methods will depend on how much the gutter has sagged and what caused it. The instructions for each method are detailed below.
A point of caution is that these methods all require you to go up a ladder and work from it. If you have a fear of heights, you’re better off leaving the job to a professional who will do a great job too. Also, if it’s your first time working on gutters, you should consider the professional as it can get a bit complex at times.
The three methods for fixing your sagging gutters are as follows:
Method 1: Reinstalling Hidden Gutter Hangers
The first solution to your sagging gutters is reinstalling the hidden gutter hangers in the following steps:
1. Climb the ladder to the gutters
Start by climbing the ladder to a point where the gutters are level with your midsection for ease of work. Always observe the precautions of using a ladder since it’s very dangerous using on. Never move back and forth on the ladder as you can destabilize it leading to falls.
2. Undo the old gutter hangers
The gutter hangers are located on the inside of the gutters from above. You should inspect them to find out which ones are sagging out. They are usually held in place by a screw or two. Once you identify the loose ones, undo their screws to ensure they are easy to remove from the gutter.
3. Remove the hanging gutter hangers
After undoing the screws, tilt the hangers towards you so that they come loose off the top of the gutter. The gutter hangers often have a loose section you can use as the handle to undo them.
4. Replace the gutter hangers with new ones
With the new hanger in hand, lower the twisted end into the inside of the gutter such that it can fit into the section occupied by the previous hangers. Make sure the screw holes for the new gutter hangers align with the holes of the previous hangers. If they don’t fit or are loose, make new holes a few inches to the side.
5. Tighten the hangers to the gutters
Insert the screws into the holes of the gutter hangers then drive them in. You may not need the screws from the old hangers as gutter hangers come with their own screws. Tighten them to make sure the gutters are held properly in place. You can test that by lightly pushing them down to check their sturdiness.
This should prevent the gutters from sagging although it’s not enough on its own. For the best results, combine it with the solutions offered below.
At times, you have to install gutter hangers on gutters that don’t have them. This keeps them from hanging since the hangers hold both sides of the gutters to keep them from sagging.
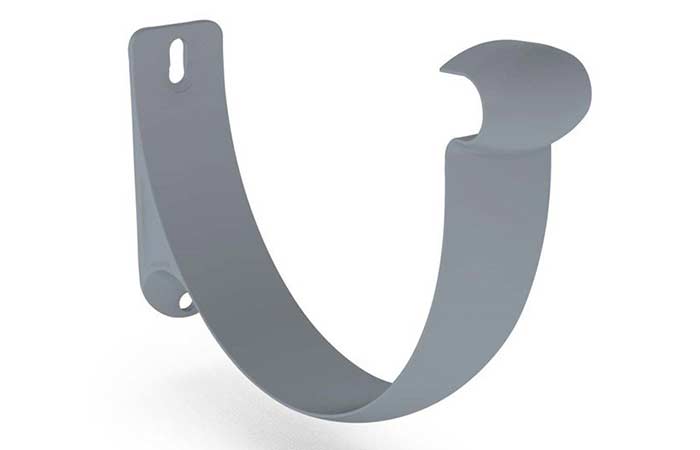
Method 2: Replacing the Gutter Bracket
This method requires following these steps to fix the sagging gutters:
1. Climb the ladder to the height of the gutter
Make sure the ladder is on steady ground and the distance from the wall is the recommended one to provide a stable working area. For safety reasons, always maintain three points of contact with the ladder to maintain a safe working environment. This can be your feet and one hand or feet with a harness around your midsection.
Climb to the height of the gutter and never stand on the topmost rung of the ladder for your own safety. Have a spotter on the ground to hold the ladder and help keep you safe while you’re on the ladder.
2. Remove the bracket of the gutter
The bracket of your gutters is the series of C-shaped pieces holding the gutter in place from below. You should remove them by holding the top part of the bracket then pulling it towards you until it comes loose.
Do this for all the sections of the gutter that are hanging. If some sections of the gutter have been screwed onto the brackets, use a screwdriver to undo them. You then remove the gutter afterwards.
3. Remove the gutter
Have someone else go up another ladder so that you can help each other remove the sections of the gutter that were sagging. Since the brackets have hook-like sections at their edges, guide them so that they come out without any damage.
Lower the gutters by going down the ladder in unison. If you try to descend the ladder on your own with the gutter, you’re likely to fall off. Place them on a level place then ascend the ladders again to remove the next section of the gutter.
4. Remove the brackets from the fascia board
Having removed the hanging gutters, the next step is to remove the gutter brackets. Usually, they’re fixed to the fascia board by a pair of screws or nails. If they’re screws, use a screwdriver to undo them. If they’re nails, use a claw head hammer to remove them from the fascia board.
Remove them one by one handing them over to someone on the ground. Make sure they don’t ascend the same ladder you have as you light overload the ladder leading to an accident.
5. Replace the brackets
Make sure you bought a set of new brackets with similar dimensions to the ones you removed from the fascia board. With these new ones, position them on the fascia board such that the holes in them align with the holes on the board for the screws. Drive the screws through them to fasten them on the fascia board.
If the holes for the screws are too loose, move the bracket two inches to the left or right then make new holes for them. This way, they’ll stay in place when you install the gutters afresh.
6. Reinstall the gutters
Place the gutters inside the brackets making sure the back lips are under the roofing materials for proper water collection. Push the gutters downwards while adjusting the brackets so that the outer edge of the gutters snaps into the position under the lip of the brackets. This should keep the gutters firmly in place. You can then reinstall any other parts you had removed from the gutters such as the gutter spikes.
If the gutters are too heavy for the current brackets, add new ones in between the current ones to offer more support to the gutters.
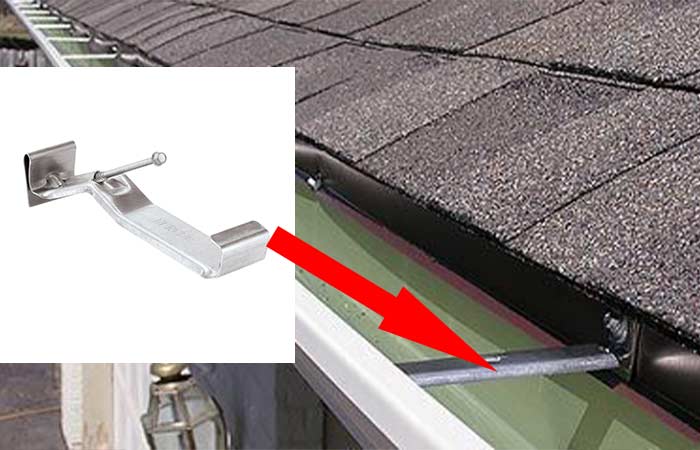
Method 3: Changing the Gutter Spikes
For this method, you should follow the steps below:
1. Place the ladder next to the gutter
The first thing to do is to correctly position the ladder against the wall to provide a steady base for your work. You can do this by dividing the height of the ladder by 4 then setting it this far from the wall. For example, if your ladder is 12 feet (3.7 m) tall, you can divide 12 by 4 to get 3 feet. As such, the ladder needs to be 3 feet away from the base of the house.
Always have a spotter holding the ladder for you to prevent you from falling over while working. You can use a harness to anchor you to a point on the roof whereby falling over won’t hurt you. Lastly, avoid standing on the top rung of the ladder as you’re highly likely to fall off.
Besides that, make sure the ladder is on stable and non-slippery ground for the best results. You can even make small holes on the ground to keep the ladder in place. For concrete floors, use a ladder with rubber on the feet to avoid slipping.
2. Remove the old gutter spike from the gutter
There are two types of gutter spikes namely the ones driven in by a screwdriver and the ones driven in by a hammer. If you have either of them, use the right tool to remove them from the gutter. For the screwdriver type, use the right type of screwdriver (either flat or star) to remove the gutter spike. Turn the screwdriver in a counterclockwise direction until the screw comes out.
If it’s the one that uses the hammer, place a claw hammer against the gutters with the gutter spike between the two claws of the hammer. Rock the hammer on the gutter while pulling up the gutter spike until it comes out.
3. Replace the gutter spike
Find a gutter spike or screw with a length of about 18 to 20 cm (7 to 8 inches) and with about 5.1 cm (2 inches) of threading at the end. Align the new spike such that the threaded end goes through the two sides of the gutter and into the fascia board. Drive the threaded end at least ½ of an inch into the fascia board.
If the hole occupied by the previous gutter spike is too loose, make a new one either to the left or right side of the previous one. Make sure you have the spike going through both sides of the gutter to get the best fitting for the gutter.
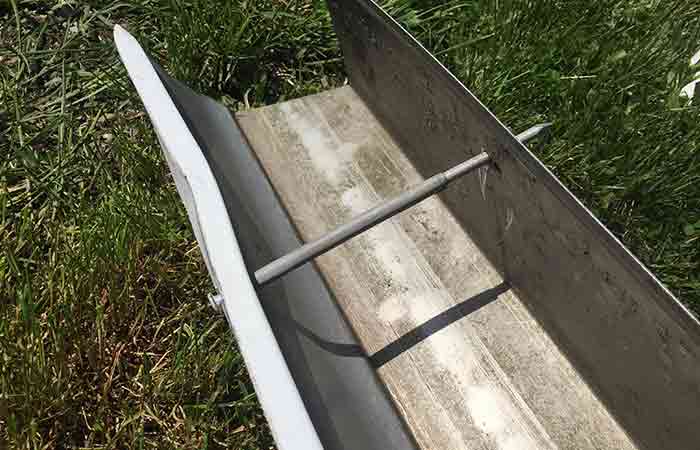
4. Add the metal ferrule to the end of the gutter spike
Metal ferrules are tubular pieces of metal which support the structure of the gutter to avoid bending or sagging. You can add them to the gutter by placing them inside the gutter then slide one end over the gutter spike. You then have to position the end of this ferrule such that it aligns with the hole at the back of the gutter. Push the gutter spike through it completely.
If you’re wondering where to get the metal ferrules, know that some gutter spikes come with them ready. If not, you can buy a new set of ferrules. Just make sure they are of the right size and match with your gutter spikes.
5. Tighten the gutter spike to the fascia board
Start by screwing the gutter spike through the back hole of the gutter to ensure a secure level of tightness. Turn the screwdriver in a clockwise direction until it holds the gutter securely to the fascia board. If you’re using a hammer, hit the head of the gutter spike until it’s holding the gutter to the fascia board securely.
Avoid driving the gutter spike too much into the fascia board as you can damage the gutter or split the fascia board. Also, make sure the hole the gutter spike goes through is a safe distance from the edge of the fascia board to avoid splitting it.
6. Fill up the gutter hole
Lastly, you should fill up any spaces left around the hole on the fascia board with epoxy and wooden shims. This is to prevent it from staying loose and letting the gutter sag again. The aim is to make the screw tight enough to hold the gutter spike and the gutter in place.
Measure the size of the gap on the fascia board then cut a wooden shim to fit the hole. Cover the gap with epoxy then push the wooden shim into it to fill up the gap. Pieces of scrap wood or golf tees can be used in the place of wooden shims.
Like the gutter brackets, you can also add to the number of gutter spikes to provide better support to the gutters.
More on Gutters
- Why are Gutters Important & When are Gutters not Necessary?
- How Long do Gutters Last?
- Do Gutters Cause Ice Dams?
- How to Install Gutters Without Fascia Board
- Vinyl vs Aluminum vs Steel Gutters: Differences, Pros & Cons
- Rain Gutter Alternatives, Low Maintenance, Cheap & DIY Options
- Rain Diverter vs Gutter-Differences & Similarities