

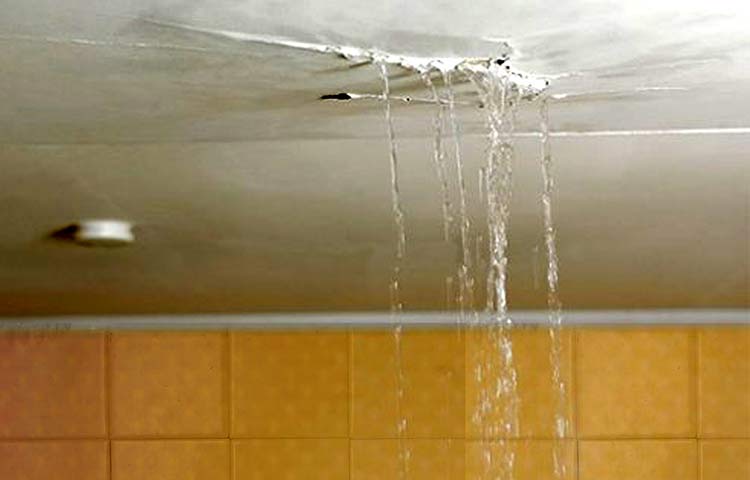
While you may see a wet spot on your ceiling or water dripping from the ceiling, finding the exact location of the leak can be quite a tricky task. In fact, a large part of fixing a leak entails correctly identifying the source of the leak.
What makes it to find roof leaks is that water works in a very different way from other substances. In our experience, most leaks occur way higher than the area you observe them from. For example, a leak can occur at the top of the roof then water flows along the roofing and only appears on your ceiling at the point where the roofing beams meet.
The strategy you’ll need to identify the source of the roof leak will depend on the actual source of the leak. While some leaks can be identified from the house, others will need going into the attic. Still, others may require you to climb on the roof or even pour water on it to check how it behaves.
Finding the Source of a Roof Leak
For each source of a roof leak, we detail the best method of identifying the actual source of the leaks. You should be prepared to get into the attic or even climb the roof for the best leak establishment.
Among the methods you can employ to locate each source of leak include the following:
1. Simple Observation
For an old roof that is having more and more frequent leaks, simply looking at a given section of the roof especially from the outside can reveal the area with the issue. For most old roofs, broken parts can be seen from the outside including missing shingles, discolored parts and, in some cases, broken sections of the roof.
For roofs without a ceiling such as those in garages and barns, you can easily see the affected section from below the roof. This is possible given that these roofs are openly visible from the ground. You may, however, need to get closer to the roof from inside as most of them are quite high and out of reach.
Using this method only gives you a general view of the leak and not much more. If, for example, you see a section of the roof with a discolored shingle or hole, you can’t tell exactly how water passes through it. We thus advice that you use this method then check for the details with the rest of the methods on this list.
2. Checking for Cracked Roof Venting
Your roof has small vents to give moisture a way out of the house and to avoid a buildup and condensation which easily damages the roofing materials. When these vents don’t work as needed, moisture will build up within the roof or water will find its way to the rest of the roof.
For this exercise, you’ll need to climb to the roof to check each vent and establish its integrity. Roof vents are held into place by a combination of rubber boots and flashing around them. Missing or broken flashing and rubber boots will show you the source of the leak. Some vents are also held in place with nails. If the nails are missing or loose, they’ll allow water in as well.
3. Checking Ice Dam Leaks
Ice dams form when melting snow from the upper sections of the roof is cooled to ice at the edge of the roof. As more water flows from the upper sections of the roof, the ice dam grows larger with time. Besides exerting unnecessary weight on the roof, the ice dam holds water on the shingles for long periods of time. The water can easily find its way into the roof leading to leaks and eventual rots.
While you can climb into the attic to check the leak from an ice dam, there isn’t anything you can do from that angle. The best way is to remove the ice and snow from the roof then check for the area affected by the ice dam and what led to the leak.
In some cases, you might not even find the leak after the ice dam is removed. This is because the leak could be due to the pressure exerted on the roof and not necessarily a broken part of the roof. The weight of the ice may warp some areas or undo a seal letting water into the roof. When the ice is removed, the part may recover its original shape and level of sealing.
In our view, the best way is to remove ice dams as soon as possible since they may lead to the formation of ice on the whole roof. This puts a lot of pressure on the roof with the likelihood that the whole roof could come down.
4. Condensation Check
Condensation in the house occurs when rising moisture from the house is cooled by the roof especially during the cold seasons. As more and more steam gets cooled, it collects into more water which may appear as a leak on the roof. It is often caused by malfunctioning vents from the roof such that, instead of escaping to the air outside, the moisture is trapped inside the roof.
To check for condensation, you’ll need to climb into the attic and check for dampness or a musty smell indicative of the growth of mildew or mold. Your climb into the attic should be done carefully most probably with someone else holding up the ladder for you. Once you’re in the attic, watch your steps as they should be on joists only. Otherwise, you’ll break the ceiling when walking around. Another thing to remember is that you’ll need a flashlight to check exactly where the condensation is occurring and the best way to fix it.
5. Checking for Leaks from Shiners
Shiners are the roofing nails that missed their mark on the wood below the shingles. They thus hang in the attic with only the shingles holding them in place. They often appear harmless until there’s rain or snow in which water and frost get under the roof around the nail. Roofing nails are watertight due to the sturdiness they get from being in the roofing wood.
This type of leak is found by scouring the roof from the attic. This is because checking from the roof can’t reveal the hanging nail. It can be difficult finding this kind of leak without water as some nails may not be directly visible. You will thus need to pour water on the roof then check from below.
During snowy weather, you can easily find these types of leaks as they will stick out with snow poking out under the roof. Garage and barn roofs are easy to find this leak as you’ll see the nails even when standing on the floor of the building.
6. Checking for a Cracked Chimney
Chimneys offer various challenges to making a roof leak-proof as their structure is quite complex. If your roofer doesn’t do a proper job at making a properly-sealed chimney, you’ll have leaking issues until the chimney is fixed.
For this kind of leak, someone must go to the roof and the attic as well. The first area to check is the mud cap. This is the top of the chimney which is often placed on the top at the very end of the construction of the chimney. In most cases, water sneaks in through this cap when it’s worn out or poorly placed on the top of the chimney.
Th second place to check is the joint where the chimney joins the rest of the roof. A lot of roofers find this area technically difficult as it means transitioning from mortar to shingles with both items being placed at different dates. The person in the attic is at a better place to check for the likelihood of leaks as they can see where water can enter from a better angle.
The last area to check is that of the shingles next to the chimney. When they come loose due to some reason, they will allow water in. They could also have been poorly placed making it easy for water to find its way into the roof.
7. Checking for Leaks on Skylights
Skylights allow the extra light from outside to brighten up rooms. They also help airborne objects such as planes see your house from above. They’re simply windows on the roof letting in light. They’re not, however, meant to allow in water in the house. Poor fitting and sealing when installing the skylights allow water to enter the house as a leak.
The best way to find leaks caused by skylights is to climb to the roof and physically examine the area around the skylight for compromised sealing. At times, the material the skylight is made of such as glass or plastic may be broken thus letting in water.
8. Checking for Broken Shingles
While it’s easy to spot a missing shingle from the ground or in the attic, it’s quite a task finding one that is broken. In most such cases, the shingle would be broken but still appears to be in place when observed from a distance. This can be caused by various issues among them the weight of snow and ice or having stepped on the roof when checking for something and making repairs.
For such a case, you’ll need to either climb on the roof or go into the attic or both. First, you’ll go into the attic to trace the exact location of the leak. In some cases, you’ll also see the broken shingle from below. In most cases, however, you’ll need to climb to the roof after marking the exact location of the leak. The best-case scenario would be having someone on the roof while another one in the attic for easy location of the leak. This way, they can coordinate on the right location of the leak and the broken shingle.
9. Checking for Leaks from Roof Gutters
Roof gutters have the simple task of collecting and directing water from the roof to a specific location. This role can be hampered by various aspects including disjointed parts, clogs or even holes in the gutter. Water escapes the gutter and goes to the roof leading to rots and other issues.
To find this kind of leak, you’ll have to inspect the whole gutter all around the house. It’s a kind of leak that’s very easy to find. If you can’t find it with ground observation, you’ll do much better with a ladder to inspect it from above. For gutters above the second floor where a ladder can’t reach, you’ll need an expert to get on the roof and inspect them.
10. Checking for Leaks in Roof Valleys
A roof valley is the low region between two roof planes. If your roof is still new yet it leaks, chances are very high that it’ll be due to a problem in the roof valleys. This is because a lot of roofers find it hard making leak-proof valleys. As such, its best to find the roofer to fix this issue.
This one requires both climbing on the roof and observation from below to find the leak. It may be a simple issue of poor craftsmanship or accumulated dirt. Other times, it’s a broken part of the valley. Given that these regions experience higher water volumes than the rest of the roof, it’s likely that a poorly fixed part was overwhelmed by the speed and weight of the water leading to a leak.
11. Using Infrared
For the most difficult of leaks, technology can lend a hand in finding their exact location. Maybe you’ve seen water dripping down your ceiling but can’t establish the exact point it slips under the shingles. Or you’ve taken note of a musty smell indicating the presence of mildew or mold in the roof yet can’t locate the leak.
In such a case, infrared technology is put to use. Infrared technology works by showing temperature differences between various parts of the roof. It’s the same technology used in night vision cameras. For this technology, the hotter the area, the redder it shows on the screen.
The detection system is based on the heat behaviors between different substances. Water takes long to absorb heat but also takes long to lose the heat once it’s heated up compared to most solids. When there’s a leak in the roof, part of it will absorb moisture. During the day, the moisture is heated up together with the rest of the roof.
Just as the sun is going down, a temperature gauge using infrared cameras is taken. Given that the areas with moisture will still be hotter than the surrounding areas, they’ll record a redder reading on the infrared camera. This way, the location of the leaks can be traced with more accuracy.
These methods can be used for any kind of roof whether its flat, arched, dome-shaped, metal or shingled one. The focus should always be finding the actual place the water gets under the roof and not just where the water drips from the roof or causes damage.
Further Reading