
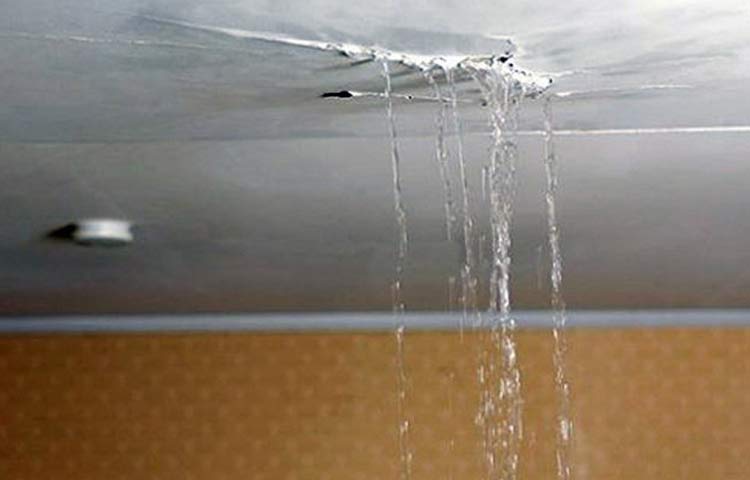
Roof leaks are never pretty. Besides being a sign of a malfunctioning roof, they also mean that you’ll need to urgently fix the cause of the leak before the whole roof becomes compromised and collapses. The good news is that early detection of the cause of the leak goes a long way in helping you prevent a disaster coming your way. The bad news is that some leaks are just a sign of a major underlying problem.
In looking at the causes of roof leaks, a majority of them are smaller issues such as cracks and misalignments while a few can be due to major issues such as broken parts of the roof. Others may not even be an issue with the integrity of the roof but the environment. Condensation on the roof is such a cause.
In this article, we look at the causes of roof leaks on all types of roofs and in all conditions. Our advice is never to ignore a roof leak however small since it always grows bigger and never solves itself. The most likely causes of that dripping sound in your house include the following:
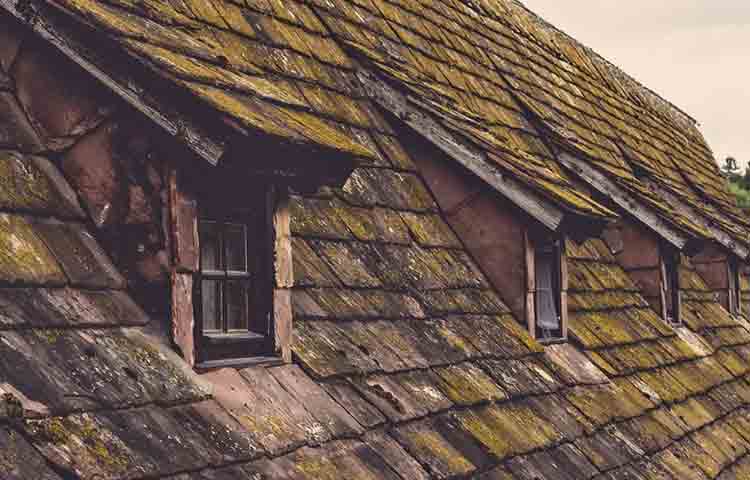
1. Old Roof
Your roof is exposed to the environment more than any other part. Rain, the sun and storms all have their turn at your roof through its years of existence. With time, the roofing materials will get old and need repair or total replacement. If you realize that leaks have been frequent and your roof is more than a decade old, it’s time to consider repair or total replacement.
You will need a professional if extensive repairs are required for your roof. The same applies for when you need the roof replaced. This will require extensive assessment on how to best replace the roof at the best cost and without damage to the house. If the previous roofing wasn’t done correctly, it’s your chance to correct the issue and have better roofing in this overhaul.
2. Condensation in the Attic During Heavy Rains
While your focus may be on water getting under the roofing shingles, there’s a possibility that the water may be simply coming from under the roof itself. This is especially the case when the attic has a musty smell indicating of the presence of mold and mildew.
Condensation occurs when moisture from within the house cools inside the roof owing to colder temperatures outside the house. You will need to check for the integrity of the roof to ascertain that it is indeed condensation and not a compromised part.
Treat the growth of mold or mildew. After that, ensure all the vents on the roof are in working condition. These allows the moisture from within the house to escape to the environment instead of condensing under it. The other solution is to install a ventilation fan in the attic if you think there isn’t enough air circulation.
3. Broken Shingles
One of the most common sources of roof leaking is a broken shingle(s). This one is easy to spot as you simply need to take a look at your roof from the outside to spot an uneven spot or missing shingles to know the source of the leak. Other times, you can find the missing shingles on the ground especially after heavy rains or a storm.
Broken shingles are a result of many different things including heavy rains, high winds, wearing out, weight from ice or snow, or even the impact of an object such as a rock. While shingles are often touted as being tough, they are quite vulnerable especially under heavy stress.
Simply replace the affected shingle altogether.
4. Cracked Flashing
The flashing of your roof refers to the metal pieces installed under the roof shingles and roof joints with the aim of keeping them water-resistant. They can either be exposed or concealed depending on the design of the roofing. When concealed, they would feature a rubberized coating on the top. When exposed, they have a metallic look.
When cracked or broken, they have large cracks in them. The reason they crack or break is because they are fixed with tar which is used to hold them together. When exposed to rain, wind or too much heat, tar becomes brittle or may even melt away. Exposed flashing has a high likelihood of breaking apart than the concealed type.
After identifying the origin of the leak, you pry the nails used in securing the cracked flashing up with a hammer. If there are shingles in the way, remove them with the old flashing then put in place the new flashing. Replace the shingles then fasten them in place with roofing nails. After that, apply roofing sealant to the flashing and the roofing nails.
5. Cracked Chimney in New Roofs
The structure of the roof offers various weak points that, if not finished and sealed properly, can be infiltrated by water into the rest of the roof. The fact that the chimney is made up of sand, cement and mortar (all of which are soluble in water) means that frequent exposure to water can erode some part of the roof.
The mud cap, that area with mortar at the very top of the chimney, should be the first place you check for wear and tear. Next, you check for wear and tear at the point where the chimney joins with the rest of the roof. The shingles closest to the chimney should also be checked for looseness.
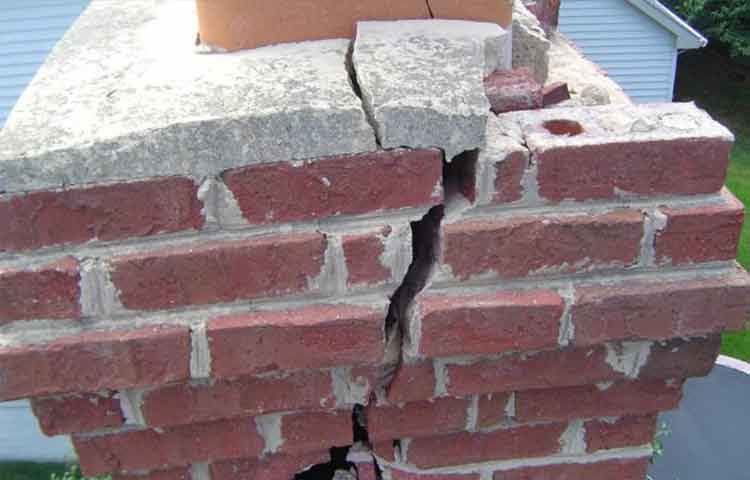
If you know exactly what material was used to make the chimney, you can identify the problem areas and replace the missing mortar or sealant. In most cases, however, extensive work may be required hence the need for a professional.
6. Cracked Roof Venting
Roof venting is meant to give moisture in the roof an escape route to avoid its buildup. At times, however, these vents get broken or cracked leading to water from rain or snow getting into the roofing leading to noticeable leaks.
Roof venting is done by sealing the vents with some flashing and rubber boots over the given areas. However, the flashing may be compromised leading to leaks which may be mild at first. You may also notice some mustiness and dark spots on the ceiling to point out to the leaks.
First, you need to remove the rubber and seal around the vent and to remove the seal connecting the vent to the nearby shingles. You then place the new boot below the shingles and over the vent to secure it into place. Secure the surrounding shingles with nails, flashing and sealant to make the whole area watertight.
7. Poorly Sealed Valleys
Valleys are the regions on the roof where two planes meet. These areas are usually very complicated and prone to issues emanating from poor craftsmanship. As water often collects in these areas before flowing downwards, any small mishap in the sealing will lead to a leak. For this reason, you need a proper roofing expert to avoid such issues.
The cause of this issue is usually poor sealing of the joints of the valley. However, it can also stem from the eroding of the sealing or the breaking of the parts after being stepped on or the weight of snow and ice.
Seek help from a professional as it’s usually one of the complex ones to deal with. The fix is usually in the form of laying a leak barrier or removing and restoring the affected part of the roof. A proper building and roofing can avoid it from the start. If possible, find the original roofer to fix it as they’ll know what the rest of the roof looks like and the best way to approach it.
8. Clogged Gutters
The gutters on your roof help with directing and collecting the water rather than having it flow off the roof. In their working condition, they do a great job. When clogged with leaves and twigs, they can pose a major roof leak issue especially during heavy rains or storms.
A clog in the roof gutter will make the collected water pool is a given area. When this happens, the water can seep through the surrounding areas. Noticing leaks from this type of cause can be difficult given that the clogs occur at the corners of the house where you’re not likely to see.
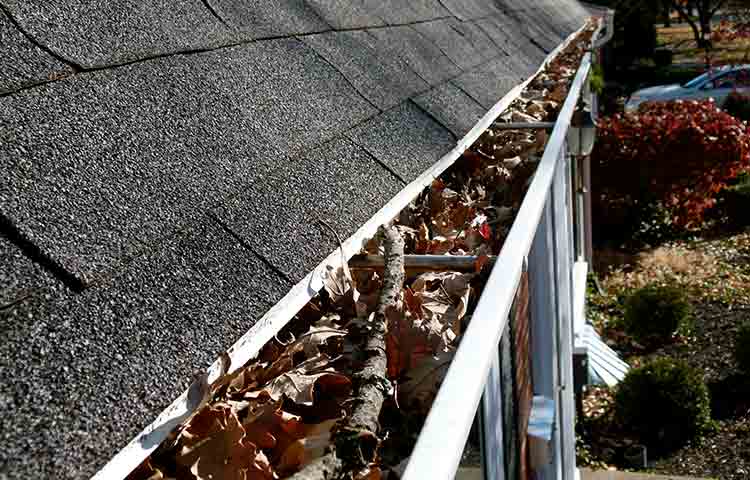
Frequent removal of debris in your gutters is the only lasting solution to this issue. You’ll need a ladder and some gloves to manually remove the debris from the gutters. In our view, routinely removing debris from the gutters in the fall and spring allows you go through the heavy rains and snow without issues.
9. Poorly Installed Skylights
Skylights make your house look good from afar and can also serve as a warning for airborne objects. However, the fact that they’re fitted into the roof rather than bought with the roof makes them vulnerable to some issues such as leaks. You can easily find these types of leaks as you can spot wet areas around the light or water droplets coming from the lights.
The problem with this issue either emanates from poor measurements of the skylights, or their insulation decaying off naturally. When installed poorly, spaces will be left between the skylights and the rest of the roof for the water to sneak in. As for the decayed insulation, spaces are also left for the water to enter the rest of the roof.
Simply resealing the whole skylight. While you can only seal the part of the skylight that’s compromised, our advice is to remove the old seal or flashing and redo it afresh. This gives you the assurance that there won’t be any chance for another leak.
10. General Roof Damage
Unlike floors, roofs aren’t meant to be stepped on frequently. In fact, most damage on roofs occurs when someone steps on a weak joint which compromises the roof leading to leaks. Besides breaking seals and individual shingles, stepping on the roof can compromise the support structure leading to warped areas among other issues.
To prevent such cases, avoid going on to the roof unless there is an urgent matter such as a stuck cat. Otherwise, always call for a professional to climb to your roof.
11. Shiners
Shiners are the roofing nails which missed their mark and simply hang on the roof and not on wood below. These ones are likely to lead to leaks as they’re not tightly held to the roof and will thus allow water to the area below. At times, you may see such a nail with frost in the winter from below the roof.
Simply pull out the nail then seal the hole left behind with a sealant. You then use a fresh nail to fasten the wood to the shingles.
12. Ice Dam Buildup
When snow falls on your roof, it’s likely to form an ice dam at the edge. This dam prevents melting snow from draining off the roof. While this leads to more ice forming at the edge, the issue is that the weight of ice can damage the roof leading to leaks. Also, the water just resting on the roof can eventually find its way under the shingles and into the rest of the roof.
When snow falls on your roof, the upper part of the roof such as the attic are often warmer than the rest of the roof. As such, the snow will melt at the top of the roof and the water formed will flow to the periphery. However, as the temperatures drop, the water turns into ice. This ice will hold up the edge of the roof in the form of an ice dam. As more water flows to the ice dam, it forms more ice and prevents the water from flowing off the roof.
The water formed can easily find its way into the spaces between shingles and into the parts of the roof below.
The only way to get rid of an ice dam or preventing its formation in the first place is to remove snow from the roof as often as possible. To remove the snow off the roof, you’ll need tools such as a roof rake or avalanche tool and others. Keeping the snow thickness minimal on the roof goes a long way in preventing the formation of ice dams.
If there’s an ice dam already, you’ll need either an ice melt product or a steamer to melt the ice off. In fact, ice dams are the most dangerous parts of snow on the roof
These causes point to the fact that your roof can leak due to a long list of causes. It only needs proper checking and fixing and you’ll be having a leak-free house again.
Further Reading