
Working on the roof can be a dangerous ordeal because there are significant risks of falling, resulting to severe injuries. This is why there are laws that require one to have on a personal fall arrest system to protect them from falls steeper than 6 feet.
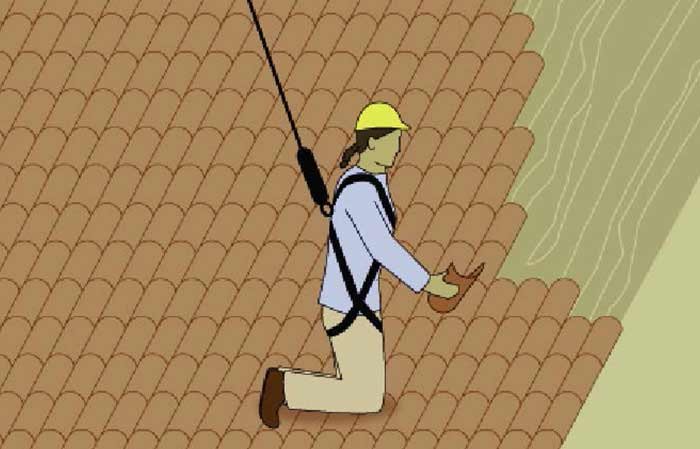
To secure yourself when working on rooftops, you need a fall arrest system which is usually made up of three primary elements; Anchor points, Bodywear- also known as the roof harness, and Connectors – these are ropes, lanyards, hooks, buckles, and rope-grabs.
For a safe and secure environment, you need these safety gear and equipment to protect yourself from hazards. Following are details of steps to ensure you are safe on top of roofs.
Step One: Install a Roofing Anchor
A roofing anchor is the main safety equipment that provides a base for the other equipment like the ropes and lanyards. It is very essential for any rooftop work especially in an open roof type such as during new construction, repairs, or re-roofing.
The main idea for installing the anchor is to pin it into a truss over the peak of the roof and use that to support a fall. Here’s a step by step illustration;
- Using nails, drill them firmly into the truss through the sheathing and into the rafter.
- Once that is secure, drive the other 10 plus penny nails in accordance with the guidelines provided by the specific anchor.
- Pull it to check on its stability and strength.
- When removing the anchors, feel the holes with cement using a caulk gun.
The process is rather easy, but there are crucial things one needs to note to ensure the anchor is fully supported the right way.
- The best anchor support is through the truss. This is the hardest section of the roof hence, it offers the firmest base. To confirm the position of the truss, use a hammer and gently knock on the roof to hear for the most solid part.
- Don’t anchor into a single truss, the sheathing alone, or on the guardrails. These aren’t firm enough to support a fall.
- Good anchors should support 5000 pounds per person.
- Use a manual hammer rather than a nail gun to ensure the fasteners are firmly attached to the truss.
Those are just a few tips you could use to ensure your safety is upheld during work. Still on roof anchors; there are three types; temporary, permanent, and standing seam.
Temporary Anchors
And the name suggests, these are reusable anchors that can be put in place every now and then. They’re used for light work like probably cleaning the roof, or fixing the aerial. They can be easily removed, relocated, and reinstalled.
They have a D-ring that guides you where you can hook the anchor like underneath the shingles.
Permanent Anchors
These anchors are equally easy to install but instead of constant relocation and removing, they are firmly placed in one area to provide the much-needed support. They have a discrete design unlike the temporary with a visible D-ring.
Standing Seam
Many people prefer this type of roof anchor because it’s a universal fit that doesn’t need to be fastened through the panels. It’s so light in weight.
Step Two: Put on Body Wear
In this case, you will need to wear your roof safety harness. This is a protective gear that snugs your body just perfectly. To put it on, follow these guidelines;
- Inspect the bodysuit to ensure it’s damage-free.
- Put on the harness and adjust the straps through the shoulder.
- Adjust the D-ring to ensure it’s on the upper-middle section of the shoulder.
- Fix the leg straps to fit appropriately.
- Adjust the chest straps
- Fix the tightness of every other section to ensure it’s not too tight or loose.
- Finally, check the webbing for any scratches.
The harness is the most significant piece of safety equipment you will meet after the anchor. Its main role is to secure you on to the anchor so it can adequately hold you once you fall. Many harnesses will come equipped with a full kit, hence cutting down on your work.
The kit will come equipped with;
- Heavy-duty anchor and screws.
- Hook mechanism
- Full body harness with adjustments points( up to 5 of them)
- Lanyard
- Storage bucket
- Clutches
- Buckles
- Rope grab hooks
There could be other additional elements that come with the harness. It’s all a matter of how much you’re willing to spend.
Further Reading: Best Roof Harness Review
Step Three: Use the Connectors
You already have the two essential elements of the safety gear. Now you will need connectors to attach the anchor and the harness to complete the fall arrest system. The connectors are many, most of which have their specific functions.
Lanyard
Cushions the impact from a fall. A hard fall could cause injuries, hence the lanyard will offer a safety line with a shock-absorbing feature which then reduces the impact forces once/ if you fall. Thanks to its high-quality material, your back will be supported by any hard-impact falls.
Rope Grab
Next up is the roofing grab is like a safety belt, it’s main work is to hold you securely in position, usually 5/8 inch or 5/16 inch ropes. Since these are just connectors, they will be added to various sections where necessary.
Your main work is to ensure these connectors are securely placed for your safety. For this lifeline;
- Adjust how much rope you will need for your work.
- Using the rope grab, lock your position firmly on the rope so it doesn’t move you more than you need.
- When done, unlock the grab and get off the roof.
This connector is very reliable because it lets you be in charge, in case of a fall, you’d probably be left hanging at that same length thanks to the lock on the grab.
Roofing Rope
This is not the ordinary rope you use for daily operations, it’s more sturdy and rigid. Resistant to abrasions and cuts. A roofing rope will come with two other connectors; a lanyard and double snap hooks.
The hooks are supposed to be firmly secured on the anchor to offer additional support from a fall.
Further Reading: Best Safety Roof Ropes
Roofing Brackets and Planks
For the ultimate protection, you may need to put up a surrounding cage using steel brackets. This is recommended especially for high-pitched roofs since they are often dangerous to walk on. The brackets will offer a flat base to the wall on which can further be enhanced using the planks.
Extension Ladder
Last, but not least, a ladder. This is what you will use to get up and down the roof. It should be sturdy enough to support over 3000 pounds. For the best type of ladder, check on these features;
- Load capacity
- Compliance with safety laws
- Extension length
Since you’ll be using the ladder to get up and down the roof, you will need something reliable and strong.
Further Reading: Best Ladders for Roofs
Observe Safety First
While working on the roof, one’s safety has to be paramount. Using these tools and the written guidelines, you can now easily navigate the roof safely knowing they have kept everything in place in case you fall.
Make sure you purchase the most reliable set of equipment to protect yourself from unnecessary injuries.
Recommended Reading
- Best Roof Cleaning Tools for a two-story House
- Best Roof Cleaning Rakes
- Best Roof Brushes
- How to Clean Gutters With Leaf Blower
- Can You Walk on Metal Roofs
Roof Leaks
DIY Fall Protection